3d Fractal Creation and Rendering Workflow

My fractal render that won the LuxRender "Math is Beautifull" just for fun competition
1.Mandelbulb3d
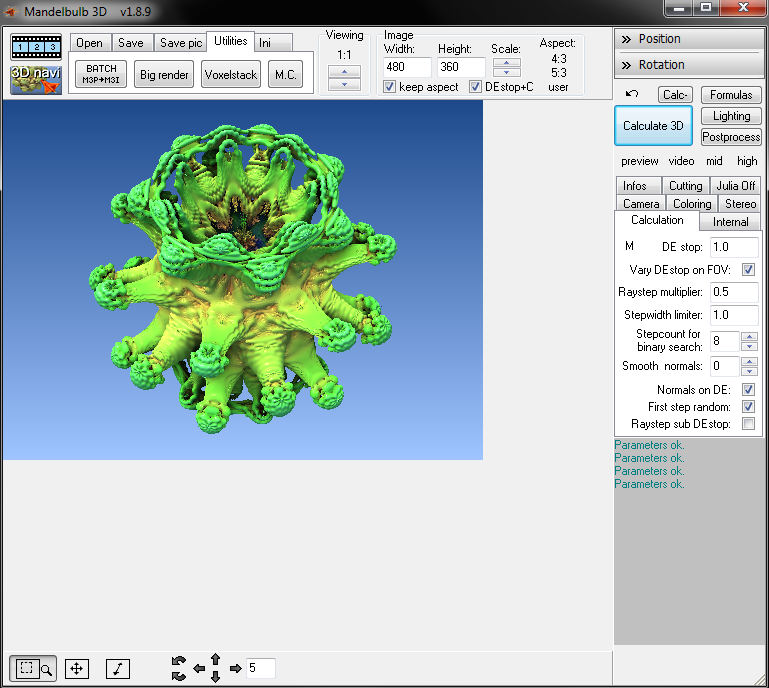
Create your 3d fractal using the free tool mandelbulb3d. You can find the latest version of the software and great info about 3d fractals here.
You can create many types of 3d fractals by opening the formulas tab and choosing one of the predefined formulas. After you choose one hit Calculate 3d and in the viewport you will see the rendered result.
You can also play around with the formula's variables inputs and even write or load your own fractal generation formula.
Analyzing different fractals and how mandelbulb3d works is not part of this tutorial but you can find many resources online and on fractalforums.
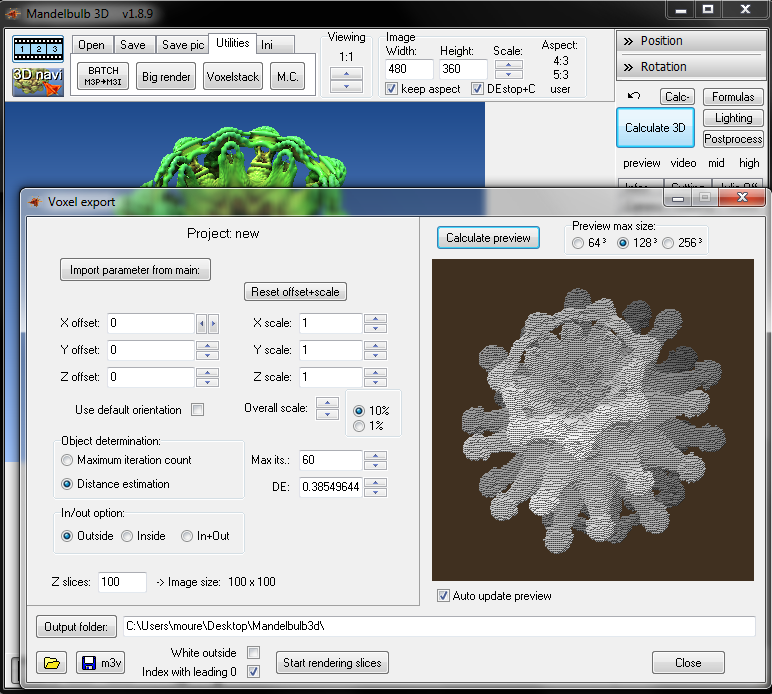
When you are happy with the result of your fractal go to "Utilities" menu item and click on "Voxelstack".
In the window that opens click on "Import parameters from main" to import the fractal settings from the main window. Then press "Calculate preview" to get a basic idea of what you will be exporting.
The most important setting here is the Z slices input. That will determine how many images you will render (and the size of them) and as a later result the quality of your final mesh. If you choose 1024 for example, 1024 images will be generated each one with a 1024x1024px size. Beware! dont overdo it with this number otherwise the calculation will take many hours and also the final mesh will be huge! From experience values from 512 to 1024 will be enough for most of your needs.
When ready choose your output folder and press "Start rendering slices".

If you did everything correctly you will end up with a folder which contains the number of images you specified in the zlices parameter before. The images will look like the one on the left.
2.Fiji

The next step is to create a mesh from this image sequence. To do this we will use a free tool name Fiji. You can download the latest Fiji version from here.
Launch Fiji and go to File->Import->Image sequence and select the first image file. In the dialog tha opens check "Use virtual stack".
Go to File->Save as->.PGM
Launch Fiji and go to File->Import->Image sequence and select the first image file. In the dialog tha opens check "Use virtual stack".
Go to File->Save as->.PGM
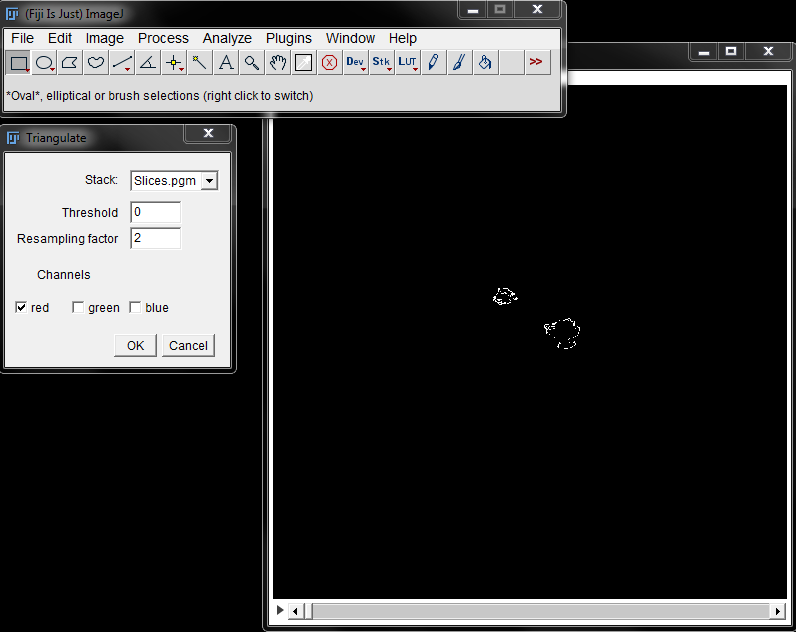
Go to File->Save as->.OBJ In the triangulate window that opens set the Threshold to 0 and the Resampling factor to 2. If you want extra detail but also higher face count you can se the Resampling factor to 1. Also since we are using a greyscale image check only the red from the 3 color channels.
When done click OK to start exporting.
To monitor Fiji i propose to open your task manager and check the cpu usage of ImageJ.exe since its not clear from the ui when Fiji is done exporting the obj file. Quiting Fiji without having exported the whole obj will result in a partial mesh file.
Congrats! You have your .obj file!
3.Inspecting and editing your mesh
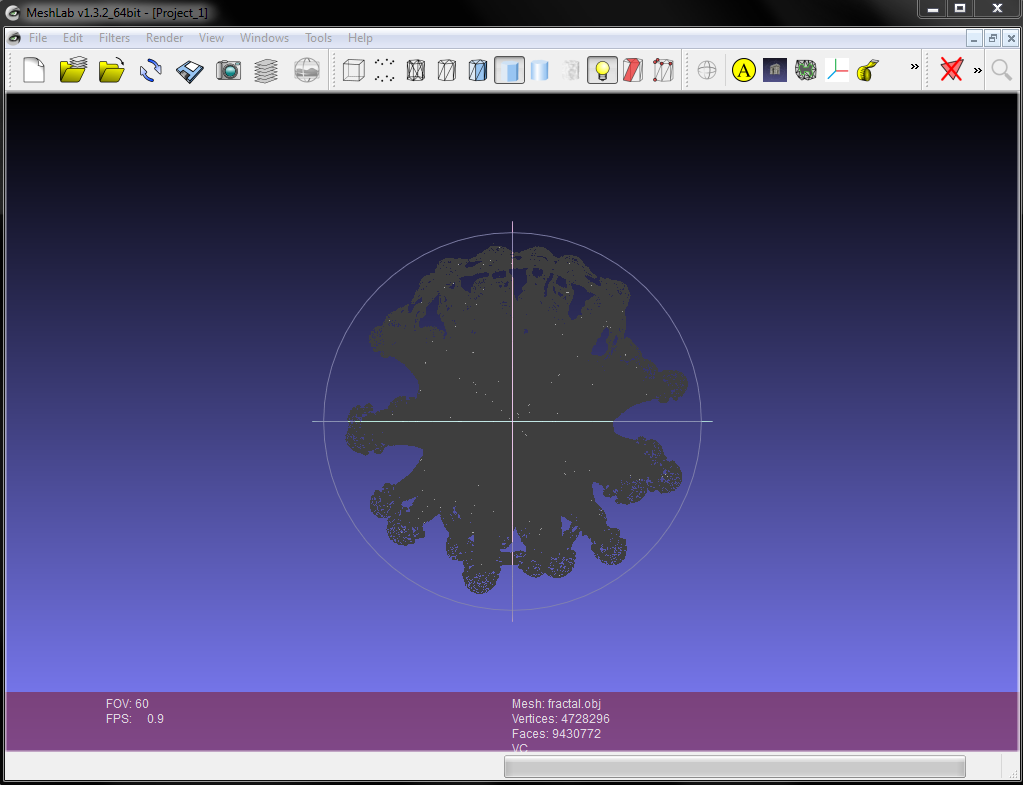
Depending on your slices count and the .obj exporter setting on Fiji your obj. file can be huge. In this instance where i used 512 image slices and Resampling factor of 1 my resulting .obj file is 340mb and has a polycount of 9,5 million.
Also in most times the surface normals of the .obj file are inverted and not smoothed. Importing that obj file directly in max or maya and make these fixes there will most probably make your computer sweat. Instead you need to tweak it first in an app that can control high poly meshes. You can do that easily in Zbrush (if you own it) or in a free tool like MeshLab.
I will quickly show you some of the Meshlab tools that you will need to use in most cases.

Firstly import your obj file in Meshlab by File->Import Mesh.
Your mesh will most probably appear black because the surface normals are inverted. To fix this go to Filters->Normals,Curvature and Orientation->Invert Faces Orientation-->Apply
If that was the issue your mesh will now look grey.
Your mesh will most probably appear black because the surface normals are inverted. To fix this go to Filters->Normals,Curvature and Orientation->Invert Faces Orientation-->Apply
If that was the issue your mesh will now look grey.
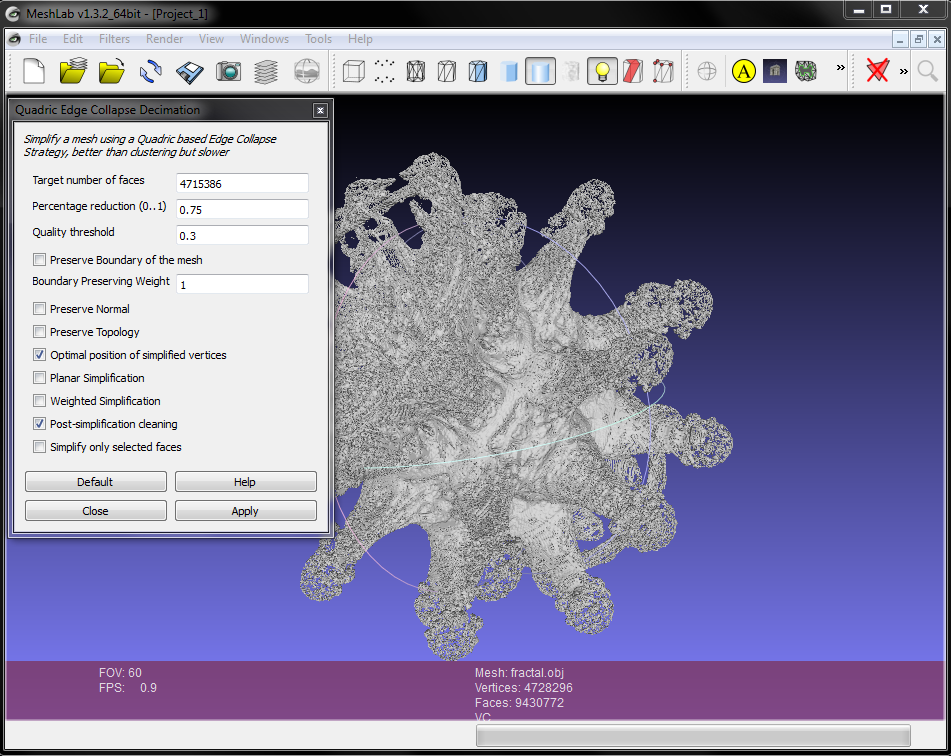
To simplify your mesh and reduce the poly count go to Filters->Quadric Edge Collapse Decimation and choose the percentage reduction you are aiming for. You can also check Preserve Boundaries and play around with the quality threshold. When you have chosen your setting click apply and let it calculate. Based on the settings you chose this can take a while, but its worth it since this filter gives great results.
Because of the way the mesh is created from the slice images you might get that stratisfied effect on your mesh. If thats not what you want you can also smooth your mesh either by traditional subdivision filters or through the very usefull Filters-->Smoothing, Fairing and Deformation-->Laplacian Smooth filter.
When you are happy with your mesh just go to File-->ExportMesh to export it in the format you want.
You are now ready to import it in your favority 3d application!
Vray specific tip
If you are a Vray user there is another trick to work with the huge fractals obj files. Instead of loading the obj file in your 3d application you can use the vray tool called ply2vrmesh that comes with your vray installation. This tool allows you to convert your obj file to a vray proxy .vrmesh file outside of your 3d application.
Here is how to use it:
Here is how to use it:
- Open a command line window by typing cmd in the windows start->search
- The tools syntax in the command line is like this > ply2vrmesh <inputFile> <outputFile> [options]
- Locate your ply2vrmesh tool in windows explorer (typical path is "C:\Program Files\Chaos Group\V-Ray\3dsmax 2014 for x64\tools\ply2vrmesh.exe" )
- Right click the ply2vrmesh.exe file while holding shift and click on "copy as path" Then go to cmd window, right click and paste it
- Do the same for your fractal.obj file
- Add a file name for your output vrmesh file.
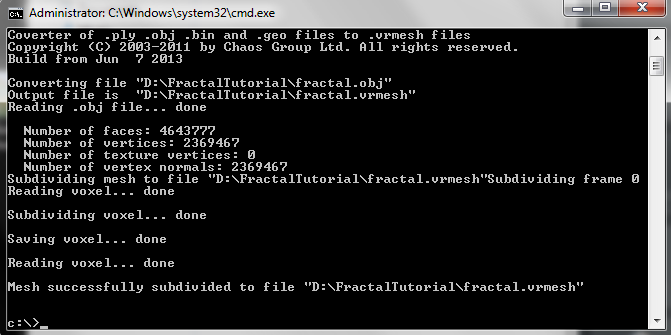
- In the end in your cmd window you will have something like that "C:\Program Files\Chaos Group\V-Ray\3dsmax 2014 for x64\tools\ply2vrmesh.exe" "D:\fractal.obj" "D:\fractal.vrmesh"
- Press enter and the tool will start creating the fractal.vrmesh file!
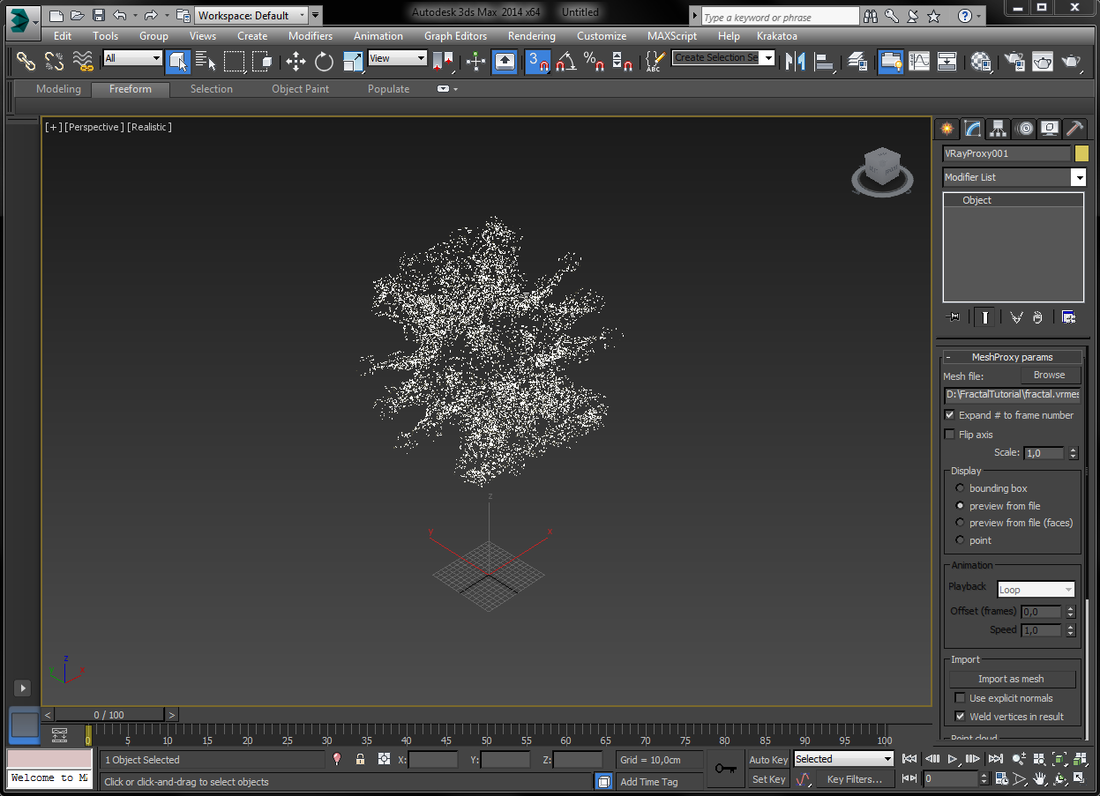
Now open 3dsMax , create a VrayProxy object from the Create Panel, and browse to your fractal.vrmesh file you created in the previous step.
Immediately you have a light representation of the fractal in your scene, extremely small memory consumption and the viewport performance is great.
Immediately you have a light representation of the fractal in your scene, extremely small memory consumption and the viewport performance is great.
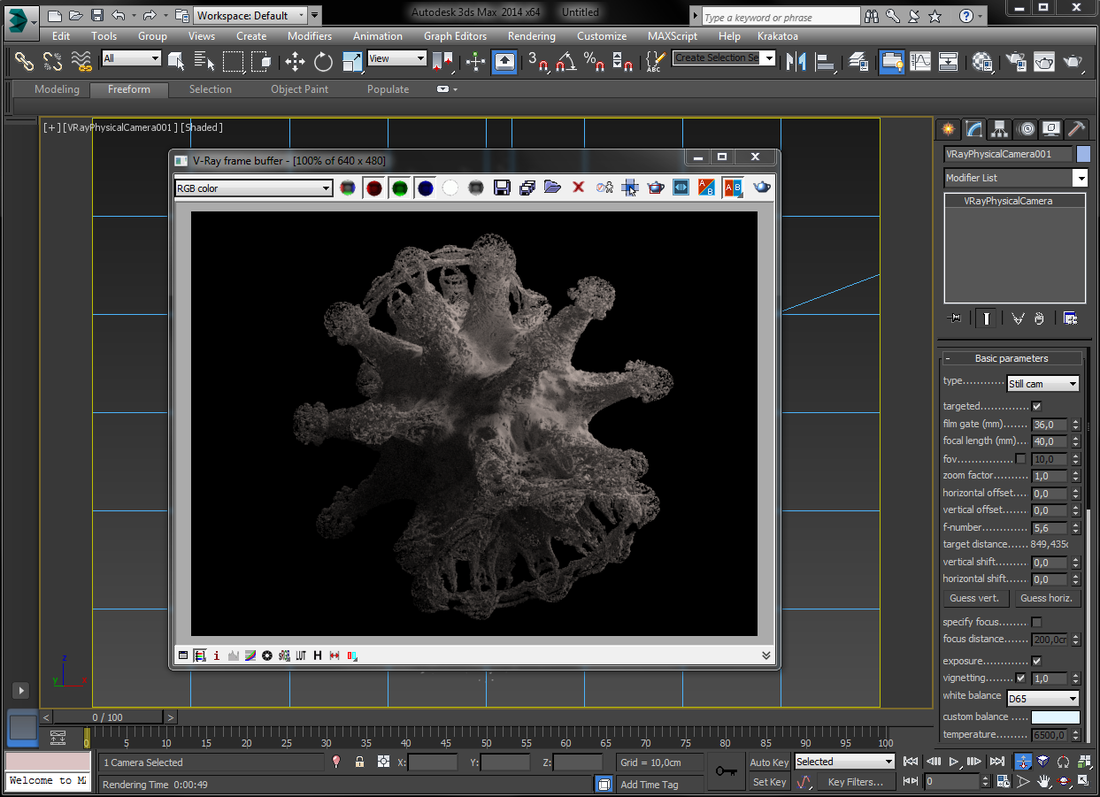
When you press render you get to render the original geometry. With this way you can render really high poly meshes using 3dsMax and vray and bring your fractal renders to life ;)
